gitee准备 注册好gitee
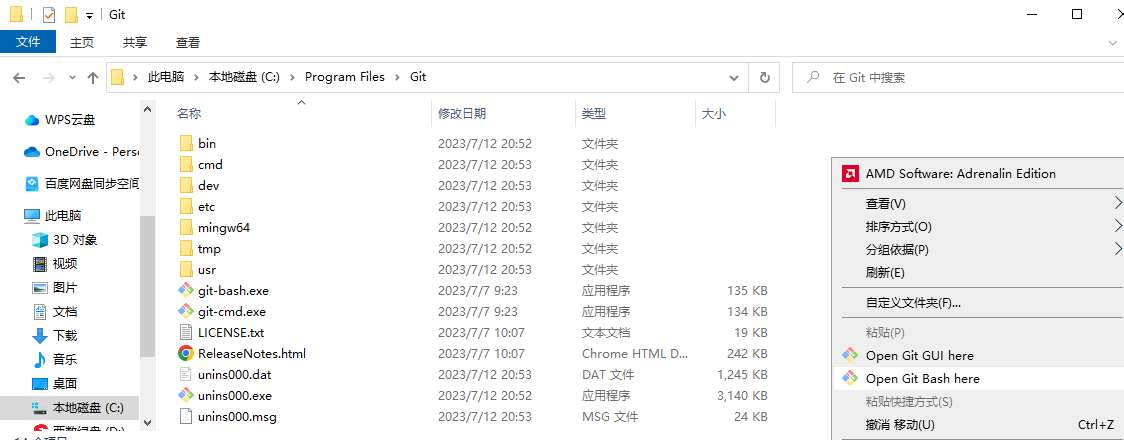
git安装与配置# 下载git 默认安装,配置 在之前下载的目录下,右键,选择【Git Bash Here】
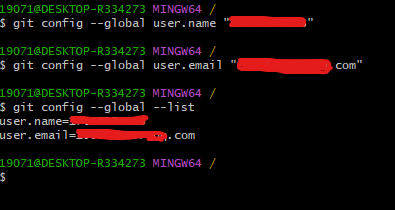
配置用户# 1 2 git config --global user.name "username" git config --global user.email "username@email.com" / /("username@email.com" 绑定的邮箱)
执行以上命令 行后 , 使用git config --global --list
命令查看配置是 否 成功,如 图所示:如果成功,会显示所配置的用户名和邮箱
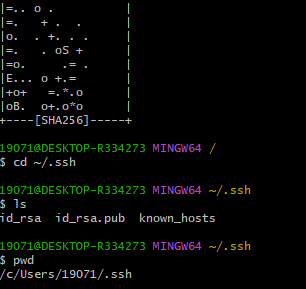
生成SSH# 继续输入:
连敲三次回车查看是否有.ssh 文件夹产生有以下两个文件:
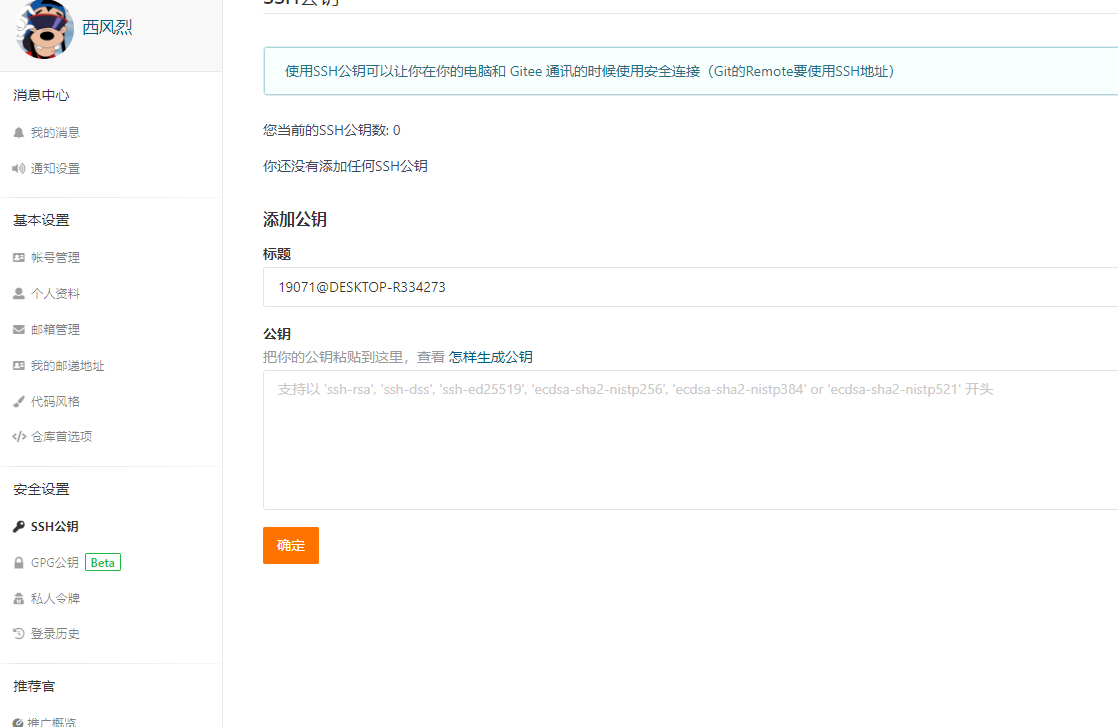
将 ssh 件夹 的 公钥( id_rsa.pub)复制 到 Gitee 管理平台 ,在 Gitee 的 人 户的设置找到如下 ,如 所示: 可以通过 git 命令复制文件:
1 clip < ~/.ssh/id_rsa.put
输入密码之后,测试一下 是否 成功,在 Git Bush 命令框 继续 入以下命令,回车:
第一次连接时, 确认并添加主机到本机 SSH 可信列表, 输入 yes 自动在.ssh 件夹内生 known_hosts 件, 即可连接成功。
配置远程仓库# 在gitee中新建仓库 新建好仓库之后再本地建一个新的空白文件夹 进入当前目录下 始化为Git 本地仓库
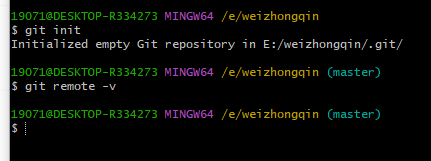
在电脑 中新建一 空白 件夹, 使用以下命令进行初始化:
初始化
使用命名查看本地仓库 git 是否配置过远程仓库
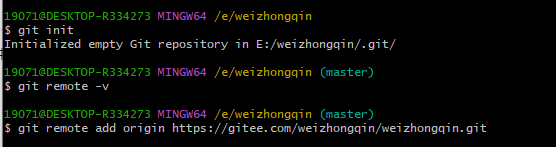
若没有绑定,绑定远程仓库,使用以下命名:
1 git remote add origin 你的仓库地址.git
连接提示测试:
1 git push -u origin "master"
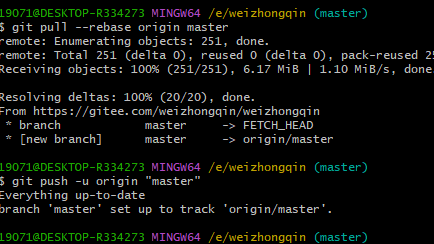
如果远程仓库不是空白的,会报这个错要使用命令 git pull --rebase origin master
将远程仓库同步到本地再连接 连接成功,git配置就好了
Git 命令总结# 1、新建代码库# 1 2 3 4 5 6 7 8 # 在当前目录新建一个Git代码库 $ git init # 新建一个目录,将其初始化为Git代码库 $ git init [project-name] # 下载一个项目和它的整个代码历史 $ git clone [url]
2、配置# 1 2 3 4 5 6 7 8 9 # 显示当前的Git配置 $ git config --list # 编辑Git配置文件 $ git config -e [--global] # 设置提交代码时的用户信息 $ git config [--global] user.name "[name]" $ git config [--global] user.email "[email address]"
3、增加/删除文件# 1 2 3 4 5 6 7 8 9 10 11 12 13 14 15 16 17 18 19 20 21 22 23 24 25 26 27 28 29 30 31 32 33 34 35 36 37 # 删除文件 $ git rm -r --cached 文件/文件夹名称 # 删除之后直接提交到远程仓库 $ git commit -m "提交信息" $ git push # 定位到 C盘 $ cd C: # 显示当前目录 $ pwd # 添加指定文件到暂存区 $ git add [file1] [file2] ... # 添加指定目录到暂存区,包括子目录 $ git add [dir] # 添加当前目录的所有文件到暂存区 $ git add . # 添加每个变化前,都会要求确认 # 对于同一个文件的多处变化,可以实现分次提交 $ git add -p # 删除工作区文件,并且将这次删除放入暂存区 $ git rm [file1] [file2] ... # 停止追踪指定文件,但该文件会保留在工作区 $ git rm --cached [file] # 删除缓存 $ git rm -r -f cached ./ # 改名文件,并且将这个改名放入暂存区 $ git mv [file-original] [file-renamed]
4、代码提交# 1 2 3 4 5 6 7 8 9 10 11 12 13 14 15 16 17 18 # 提交暂存区到仓库区 $ git commit -m [message] # 提交暂存区的指定文件到仓库区 $ git commit [file1] [file2] ... -m [message] # 提交工作区自上次commit之后的变化,直接到仓库区 $ git commit -a # 提交时显示所有diff信息 $ git commit -v # 使用一次新的commit,替代上一次提交 # 如果代码没有任何新变化,则用来改写上一次commit的提交信息 $ git commit --amend -m [message] # 重做上一次commit,并包括指定文件的新变化 $ git commit --amend [file1] [file2] ...
5、分支# 1 2 3 4 5 6 7 8 9 10 11 12 13 14 15 16 17 18 19 20 21 22 23 24 25 26 27 28 29 30 31 32 33 34 35 36 37 38 39 40 41 42 # 列出所有本地分支 $ git branch # 列出所有远程分支 $ git branch -r # 列出所有本地分支和远程分支 $ git branch -a # 新建一个分支,但依然停留在当前分支 $ git branch [branch-name] # 新建一个分支,并切换到该分支 $ git checkout -b [branch] # 新建一个分支,指向指定commit $ git branch [branch] [commit] # 新建一个分支,与指定的远程分支建立追踪关系 $ git branch --track [branch] [remote-branch] # 切换到指定分支,并更新工作区 $ git checkout [branch-name] # 切换到上一个分支 $ git checkout - # 建立追踪关系,在现有分支与指定的远程分支之间 $ git branch --set -upstream [branch] [remote-branch] # 合并指定分支到当前分支 $ git merge [branch] # 选择一个commit,合并进当前分支 $ git cherry-pick [commit] # 删除分支 $ git branch -d [branch-name] # 删除远程分支 $ git push origin --delete [branch-name] $ git branch -dr [remote/branch]
6、标签# 1 2 3 4 5 6 7 8 9 10 11 12 13 14 15 16 17 18 19 20 21 22 23 24 25 26 # 列出所有tag $ git tag # 新建一个tag在当前commit $ git tag [tag] # 新建一个tag在指定commit $ git tag [tag] [commit] # 删除本地tag $ git tag -d [tag] # 删除远程tag $ git push origin :refs/tags/[tagName] # 查看tag信息 $ git show [tag] # 提交指定tag $ git push [remote] [tag] # 提交所有tag $ git push [remote] --tags # 新建一个分支,指向某个tag $ git checkout -b [branch] [tag]
7、查看信息# 1 2 3 4 5 6 7 8 9 10 11 12 13 14 15 16 17 18 19 20 21 22 23 24 25 26 27 28 29 30 31 32 33 34 35 36 37 38 39 40 41 42 43 44 45 46 47 48 49 50 51 52 53 54 55 56 57 58 59 60 # 显示有变更的文件 $ git status # 显示当前分支的版本历史,其中commit后黄色字体显示的是每次提交的版本号,git log 命令显示从最近到最远的显示日志 $ git log # 显示commit历史,以及每次commit发生变更的文件 $ git log --stat # 搜索提交历史,根据关键词 $ git log -S [keyword] # 显示某个commit之后的所有变动,每个commit占据一行 $ git log [tag] HEAD --pretty=format:%s # 显示某个commit之后的所有变动,其"提交说明" 必须符合搜索条件 $ git log [tag] HEAD --grep feature # 显示某个文件的版本历史,包括文件改名 $ git log --follow [file] $ git whatchanged [file] # 显示指定文件相关的每一次diff $ git log -p [file] # 显示过去5 次提交 $ git log -5 --pretty --oneline # 显示所有提交过的用户,按提交次数排序 $ git shortlog -sn # 显示指定文件是什么人在什么时间修改过 $ git blame [file] # 显示暂存区和工作区的差异 $ git diff # 显示暂存区和上一个commit的差异 $ git diff --cached [file] # 显示工作区与当前分支最新commit之间的差异 $ git diff HEAD # 显示两次提交之间的差异 $ git diff [first-branch]...[second-branch] # 显示今天你写了多少行代码 $ git diff --shortstat "@{0 day ago}" # 显示某次提交的元数据和内容变化 $ git show [commit] # 显示某次提交发生变化的文件 $ git show --name-only [commit] # 显示某次提交时,某个文件的内容 $ git show [commit]:[filename] # 显示当前分支的最近几次提交 $ git reflog
8、远程同步# 1 2 3 4 5 6 7 8 9 10 11 12 13 14 15 16 17 18 19 20 21 22 23 # 下载远程仓库的所有变动 $ git fetch [remote] # 显示所有远程仓库 $ git remote -v # 显示某个远程仓库的信息 $ git remote show [remote] # 增加一个新的远程仓库,并命名 $ git remote add [shortname] [url] # 取回远程仓库的变化,并与本地分支合并 $ git pull [remote] [branch] # 上传本地指定分支到远程仓库 $ git push [remote] [branch] # 强行推送当前分支到远程仓库,即使有冲突 $ git push [remote] --force # 推送所有分支到远程仓库 $ git push [remote] --all
9、撤销# 1 2 3 4 5 6 7 8 9 10 11 12 13 14 15 16 17 18 19 20 21 22 23 24 25 26 27 28 29 30 31 # 恢复暂存区的指定文件到工作区 $ git checkout [file] # 恢复某个commit的指定文件到暂存区和工作区 $ git checkout [commit] [file] # 恢复暂存区的所有文件到工作区 $ git checkout . # 重置暂存区的指定文件,与上一次commit保持一致,但工作区不变 $ git reset [file] # 重置暂存区与工作区,与上一次commit保持一致 $ git reset --hard # 重置当前分支的指针为指定commit,同时重置暂存区,但工作区不变 $ git reset [commit] # 重置当前分支的HEAD为指定commit,同时重置暂存区和工作区,与指定commit版本一致 $ git reset --hard [commit] # 重置当前HEAD为指定commit,但保持暂存区和工作区不变 $ git reset --keep [commit] # 新建一个commit,用来撤销指定commit # 后者的所有变化都将被前者抵消,并且应用到当前分支 $ git revert [commit] # 暂时将未提交的变化移除,稍后再移入 $ git stash $ git stash pop
10、其他# 1 2 3 4 5 6 7 8 9 # 生成一个可供发布的压缩包 $ git archive # 添加或指定远程仓库地址 $ git remote set -url origin "https://..." $ git config remote.origin.url "https://..." # 删除 $ git remote rm origin
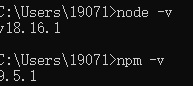
Hexo准备 node.js安装及配置# node.js官网 下载默认安装之后 CMD窗口,执行命令node -v查看node版本 最新版的node在安装时同时也安装了npm,执行npm -v查看npm版本
(可选)修改全局依赖包下载路径# 默认情况下,我们在执行npm install -g XXXX下载全局包时,这个包的默认存放路径位C:\Users\用户名\AppData\Roaming\npm\node_modules下,可以通过CMD指令npm root -g查看
C:\Users\liaijie\AppData\Roaming\npm\node_modules 但是有时候我们不想让全局包放在这里,我们可以自定义存放目录,在CMD窗口执行以下两条命令修改默认路径:
npm config set prefix “C:\node\node_global” npm config set cache “C:\node\node_cache” 或者打开c:\node\node_modules\npm.npmrc文件,修改如下:
prefix =C:\node\node_global cache = C:\node\node_cache
以上操作表示,修改全局包下载目录为C:\node\node_global,缓存目录为C:\node\node_cache,并会自动创建node_global目录,而node_cache目录是缓存目录,会在你下载全局包时自动创建
在这里插入图片描述 3、配置环境变量 因为我们修改了全局包的下载路径,那么自然而然,我们下载的全局包就会存放在c:\node\node_global\node_modules,而其对应的cmd指令会存放在c:\node\node_global
我全局安装一个vue-cli脚手架
npm install @vue/cli -g 安装完成后:
在这里插入图片描述
在这里插入图片描述
我使用CMD命令vue create myproject指令创建一个项目,显示如下 ‘vue’ 不是内部或外部命令,也不是可运行的程序 或批处理文件。 这是因为我们在执行指令时,它会默认在node安装根目录下查找指令文件,在这里就是vue.cmd,然后还会在node安装根目录下的node_modules下查找依赖包文件夹,在这里就是@vue文件夹,因为我们修改了全局包的存放路径,所以自然找不到了,所以我们需要把我们指定的全局包存放路径添加到系统环境变量,这样就可以找到了
在这里插入图片描述
再次测试:
C:\Users\liaijie>vue create myproject ? Your connection to the default npm registry seems to be slow. Use https://registry.npm.taobao.org for faster installation? (Y/n) OK,大功告成!!!!!
hexo安装及配置# Hexo官网 去官网拿到安装命令 npm install hexo-cli -g 1、安装Hexo,只需要在MyWeb目录中单击右键启动Git Bash Here,然后输入命令 2、初始化 Hexo Hexo安装完以后需要进行初始化操作。
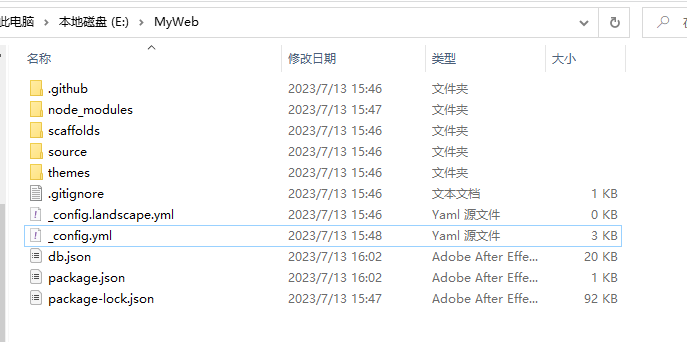
一、自己创建文件夹# 在电脑中创建一个文件夹用来存放博客,如:E:\MyWeb之后的命令行操作都在这个文件夹的目录下进行。
生成默认博客:hexo init 本地启动:hexo s
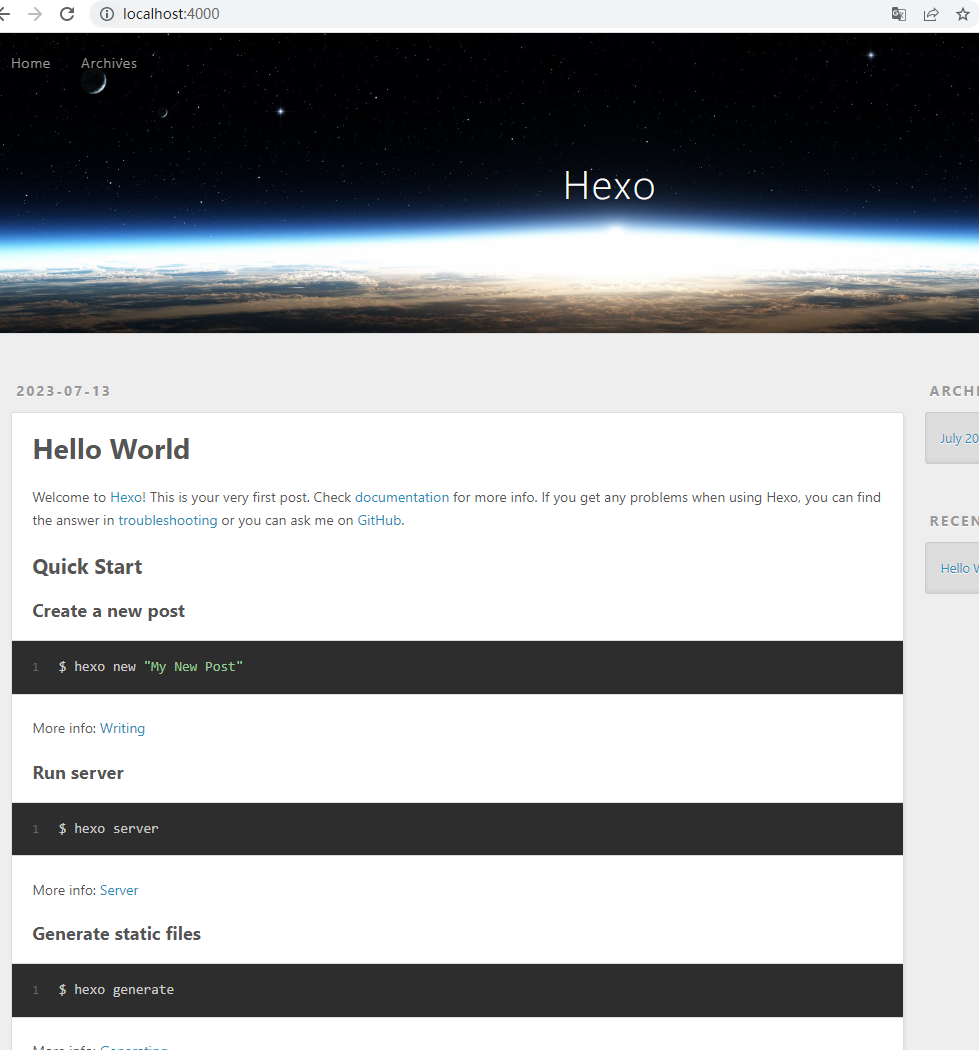
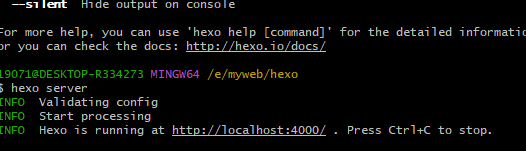
打开浏览器输入:http://localhost:4000,看到如下画面说明建站成功:
提交到Gitee上# 打开E:\MyWeb下的_config.yml文件
修改以下代码:
1 2 3 4 deploy: type: git repo: https: branch: master
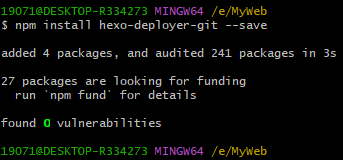
安装部署插件:# 1 npm install hexo-deployer-git
清理缓存:# 1 2 3 hexo clean` 清除缓存文件 (db.json) 和已生成的静态文件 (public)。 生成静态文件:`hexo g
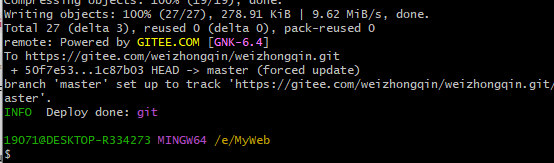
推送到Gitee:# 1 2 3 4 hexo d Gitee的用户名/邮箱 密码 F:\blog>hexo d **** **** * **** **** **** * INFO Validating config INFO Deploying: git
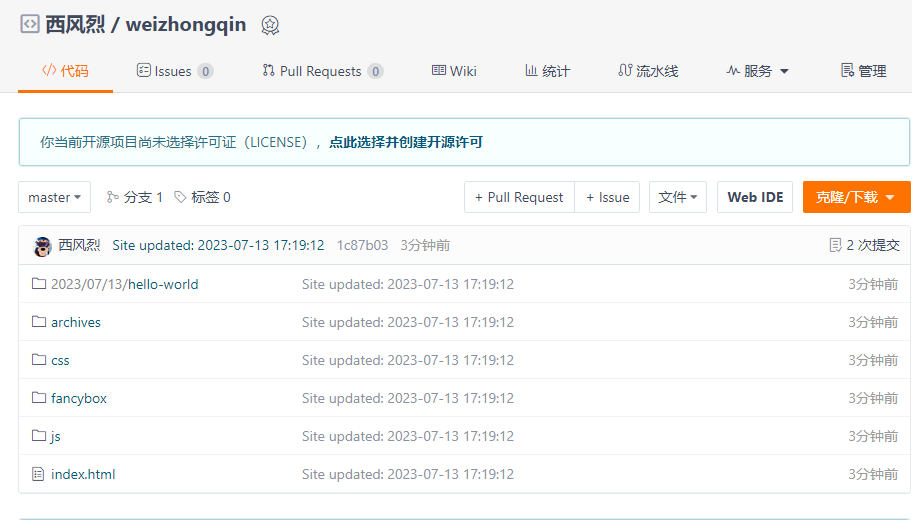
打开Gitee仓库,可以看到我们推送成功的静态文件的目录结构:
再次修改根目录下的_config.yml文件:
1 2 3 4 5 6 7 8 # URL ## Set your site url here. For example, if you use GitHub Page, set url as 'https://username.github.io/project' url: http: permalink: :year/:month/:day/:title/ permalink_defaults: pretty_urls: trailing_index: true # Set to false to remove trailing 'index.html' from permalinks trailing_html: true # Set to false to remove trailing '.html' from permalinks
更新Gitee Pages# 每次修改博客内容后都需要做以下操作:
1 2 3 4 5 hexo clean hexo g/hexo d -g/hexo deploy -g hexo d
更新Gitee Pages服务 打开浏览器输入地址:https://weizhongqin.gitee.io/,访问成功就行了
(可用)命令创建文件夹#
新建一个网站。如果没有设置 folder ,Hexo 默认在目前的文件夹建立网站。
然后就可以使用Hexo三连了,即我们最常用的三个主要命令(依旧在上述Git Bash命令端口中)cd到新的网站文件夹里:
1 2 3 hexo clean # 清空已有hexo网站文件 hexo generate# 依据网页文本与新的CSS样式生成新网站文件 hexo server# 启动本地服务器,可以在localhost:4000 查看
网站修改效果,一般默认的是一个landscape主题,后期当提交新文章或者新的样式修改时,往往都是先从本地查看结果无误后再部署到Gitee Page
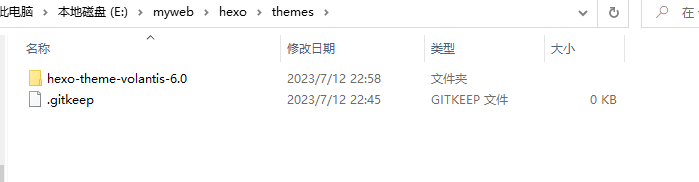
三、主题下载与安装# Hexo官网上提供了丰富的主题 可选,你只需要打开对应的界面选择喜欢的,然后点击名称跳转到GitHub仓库选择下载或者克隆对应的zip文件到本地,并且解压到网站目录下的themes目录即可。
然后接下来,你需要修改两个配置文件:你的网站根目录下的_config.yml文件,即网站配置文件; 你选择的主题的自带配置文件_config.yml,即主题配置文件; 网站配置文件会配置你网站的URL地址、博客名称以及与Gitee上传的方式等基本信息;而主题配置文件则会定义实际页面显示的美观效果、多媒体(声音视频等)以及评论等附加功能。
四、网站配置文件修改# 制定网站采用的主题样式,这里也需要注意:主题文件解压缩后不要重命名,直接将主题文件名称复制后设置为网站主题,即
1 2 3 4 5 # Extensions ## Plugins: https: ## Themes: https: ## theme: landscape theme: hexo-theme-volantis-6.0 #填写自己的样式文件夹的名字
配置里还有个选项比较好玩
1 2 3 4 5 6 7 8 # Site title: Wei Zhongqin的博客 subtitle: '' description: ' ' # description主要用于SEO,告诉搜索引擎一个关于您站点的简单描述,通常建议在其中包含您网站的关键词。 keywords: author: Wei Zhongqin language: zh-Hans timezone: ' '
主题文件下的README.md文件以根据主题特点实现自定制网站。
在此之前,你还需要在网站的Git Bash中运行一次安装所有主题依赖插件包的命令:
1 2 npm install npm install --save hexo-deployer-git #为之后做准备,不装会报错:ERROR Deployer not found: git
完成之后可以执行三行命令将本地静态资源push到码云
1 2 3 hexo clean #清理 hexo g #生成静态资源 hexo d #将本地资源提高到码云
然后去gitee上更新一下pages,然后原神–启动,就可以看到了:
五、Volantis主题个性化# 1、”Hello World”特效(通用)# 修改主题配置文件里的标题
1 2 3 4 5 ############################### Cover ############################### > start cover: ... title: '<font><span>Hello</span> <span>World</span></font>' ...
引入以下css样式,推荐添加到hexo/source/css/style.styl 里
1 2 3 4 5 6 7 8 9 10 11 12 13 14 15 16 17 18 19 20 21 22 23 .top .title span{ transition: 0.5 s; } .top .title:hover span:nth-child(1 ){ margin-right: 10 px; } .top .title:hover span:nth-child(2 ){ margin-left: 10 px; } .top .title:hover span{ color: #fff; text-shadow: 0 0 10 px #fff, 0 0 20 px #fff, 0 0 40 px #fff, 0 0 80 px #fff, 0 0 120 px #fff, 0 0 160 px #fff; }
2、自定义导航栏# 在_config.yml中放入导航栏,这里就以我的为例
1 2 3 4 5 6 7 8 9 10 11 12 13 14 15 16 17 18 19 20 21 22 23 24 25 26 27 ############################### Cover ############################### > start cover: height_scheme: full # full, half layout_scheme: dock # blank (留白), search (搜索), dock (坞), featured (精选), focus (焦点) display: home: true archive: true others: false # can be written in front-matter 'cover: true' background: https: # background: https: logo: # https: # title: 'Wei Zhongqin的博客' # "Hello World" 特效(通用) title: '<font><span>Wei Zhongqin</span> <span>的博客</span></font>' subtitle: '好记性不如烂笔头' search: 搜一下 # search bar placeholder features: - name: 主页 icon: # url: / - name: 标签 icon: # url: tags/ - name: 关于 icon: # url: about/ ############################### Cover ############################### > end
对应好各个页面的url名字即可
3、自定义页脚# 1 2 3 4 5 6 7 8 9 10 11 12 13 site_footer: # layout of footer: [aplayer, social, license, info, copyright] layout: [aplayer, social, license, info, copyright] social: - icon: fas fa-rss url: atom.xml - icon: fas fa-envelope url: mailto:#你的邮箱 - icon: fab fa-github url: #你的github地址 copyright: '[Copyright © 2017-2022 #版权](/)' # You can add your own property here. (Support markdown, for example: br: '<br>' ) br: '<br>'
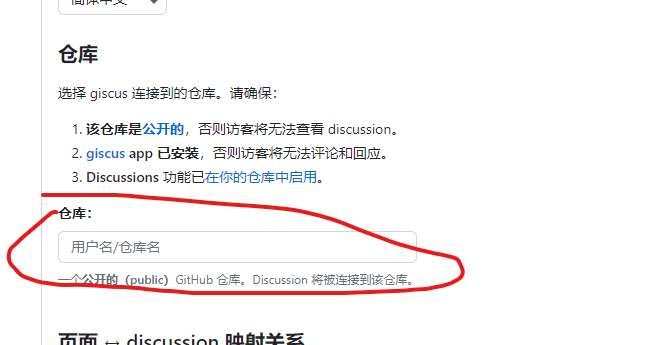
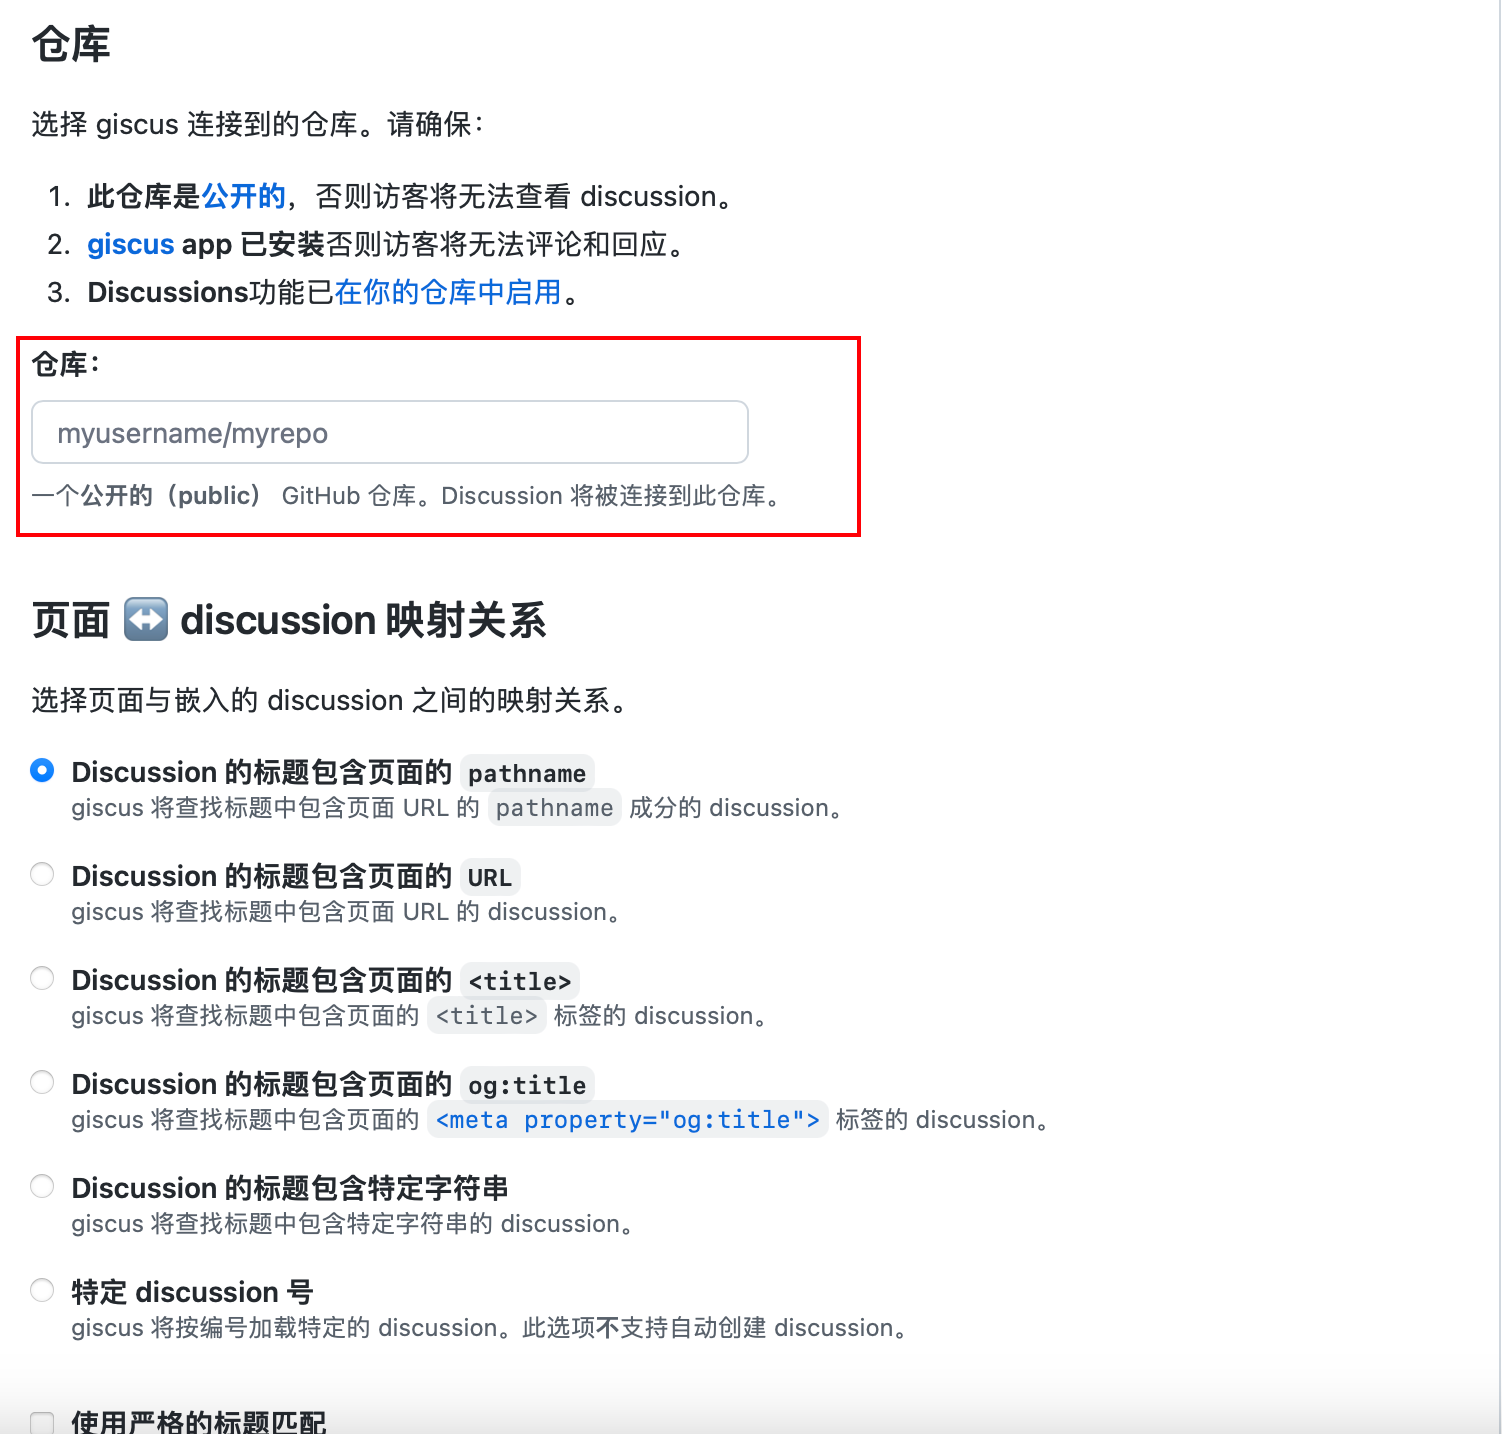
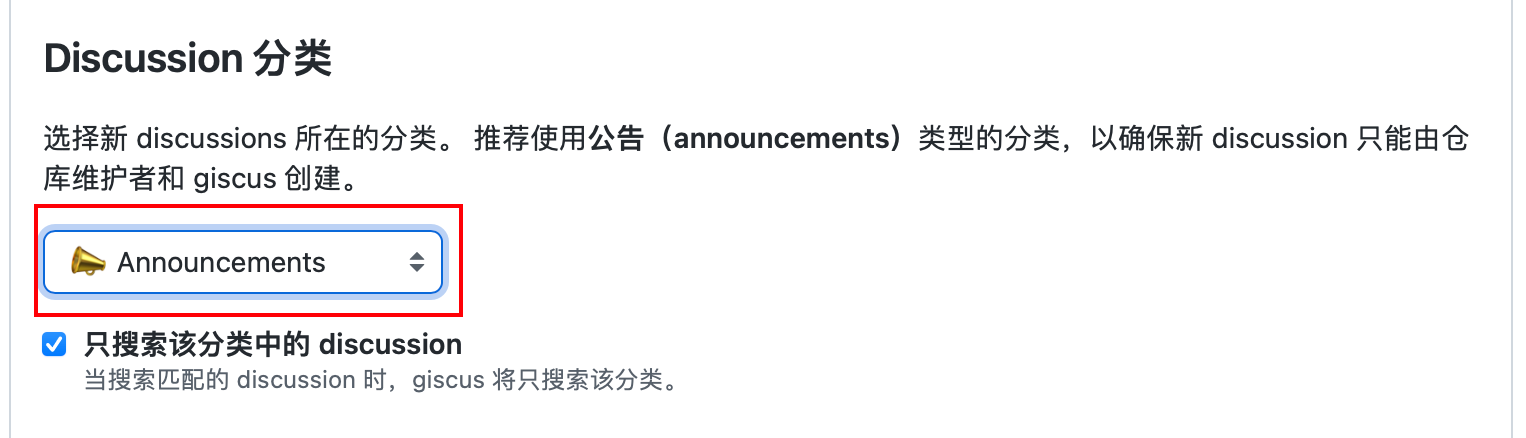
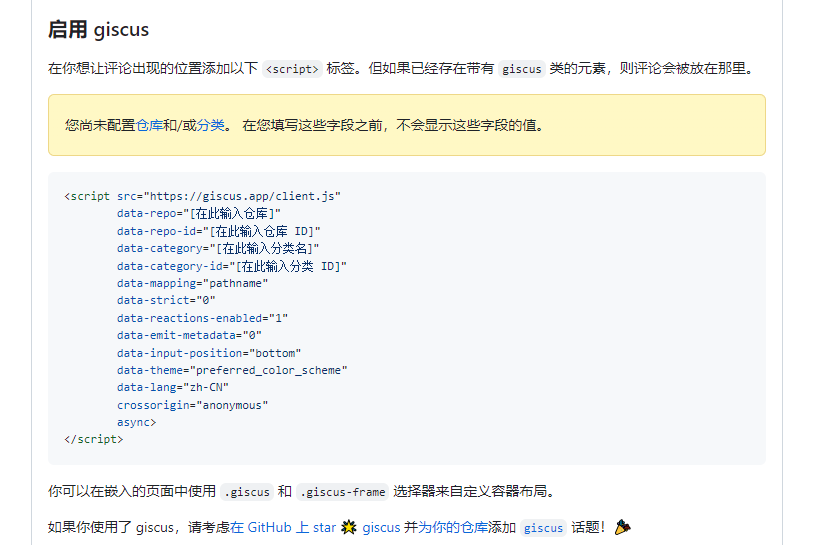
4、添加评论系统# 首先要去github创建一个公共仓库,我们就叫他comments 然后打开comments的discussion功能(在仓库的setting中,找到Features)勾选 然后打开giscus ,填入你的仓库 我用的是这个模式 这里会生成你需要用的参数填进主题配置文件里就行
1 2 3 4 5 6 7 8 9 10 11 12 13 14 15 16 17 18 19 20 21 22 ############################### Comments ############################### > start comments: service: giscus # giscus # https: # https: giscus: # 以下配置按照 yml 格式增删填写即可 repo: #库的名字 repo-id: #库id,标红框的第一个 category: Announcements category-id: #目录id,标红框的第二个 mapping: "pathname" reactions-enabled: "1" emit-metadata: "0" lang: "zh-CN" theme: light: "light" # https: dark: "dark" # https: ############################### Comments ############################### > end
其他配置可以参考Volantis官网文档
hexo建站官方文档 Gitee搭建个人博客 (一)前言 beacuse(事出有因) 搭建个人博客详细教程_向光°的博客-CSDN博客
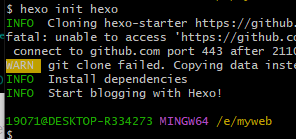
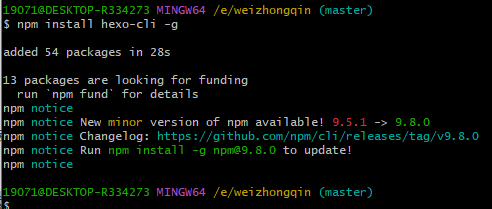